Custom 60% Keyboard Build

Introduction

I’ve wanted a mechanical keyboard for a long time, but I could never find a key layout that I liked. After experimenting with making some macro buttons, I decided to make my own keyboard. This is what happened.

Design

The reason for designing this keyboard is because I wanted a tenkeyless keyboard with the arrow keys that was still around the 60-61% size.

With that in mind, I based my keyboard off of the keyboard on the Dell XPS 15 9550 and the newer Thinkpad T-series. The right shift key was completely removed in order to accommodate full-size arrow keys and keys on each side of the up-arrow were added, similar to Thinkpad keyboards. The space bar was extended to the standard 7u and, as such, the right alt and ctr keys were also removed.

layout

As with most 60% keyboards, the function keys are not there and, as such, they are accessed via “fn+top row”.

Because the right shift key is removed, it becomes difficult to do the key combination “shift+delete” with one hand. As such, the function key is utilized to enable the key combination to be done with one hand on the left side.

I designed the layout of the keyboard using Keyboard Layout Editor. This web application makes it easy to save and modify your designs. You can access my design here.

Designing and Ordering the Plate

My plate was manufactured by Lasergist. The easiest way to get this done is by inputting your raw data from Keyboard Layout Editor into Swillkb, which will generate a plate for you and automatically send the file to LaserGist.

I used decided to use 8 mount holes (4 on the top and bottom edges) sized for M2 screws. I also rounded the corners for aesthetic purposes.

swillkb.PNG

Swillkb will generate a DXF, SVG, or EPS file. You can send this file to any company to manufacture, although you may need to change the Kerf depending on the company’s specifications.

plate

I chose the thickness to be 1.5mm, in order for the switches to snap into the plate. All in all, my plate cost $50.29 including shipping.

Other Parts

For this build, I am using:

63  x Cherry MX Blue Switches
3     x 2u Costar MX Stabilizer
1     x 7u Costar MX Stabilizer

1     x USB Type B Port
1     x Teensy 2.0

1     x USB cable I happened to have
1     x PBT 87 Blank White Key Caps from Banggood (link, not referral)

I chose the Cherry MX Blue Switch (product code: MX1A-E1xx) as I plan on using the keyboard primarily for typing. I was attracted to the tactile bump and the audible click, as well as the higher actuation force. However, this makes it less suitable for public work environments. When I build another keyboard, I will probably choose to use MX Brown switches, to make it more public-area-friendly.

The Teensy 2.0 was chosen as there is plenty of firmware available for it. More detail on this below in the “programming section”.

As I will be making my own keycaps soon, I chose the cheapest set of blank keycaps I could find, which were a set of 87 blank keycaps from Banggood. They are very highly rated and are aggressively priced. One of the keycaps arrived broken. I sent Banggood a message, but never received a response.

The total cost for the electronic parts was $75.36 from Mouser. The USB cable was $10 and the keycaps were $17.69.

The Build

For the build, I referred to BrownFox’s guide on deskauthority (found here). I found that it is more efficient to bend the transistors first. It also makes sure they all look uniform.

For the cross wires, I used pre-cut and stripped wires for uniformity, with the exception of the spacebar switch, which required a length that was in between the sizes I had on hand.

IMG_20170824_161340_edited

From this bottom view picture, you can see that I did not do a good job of connecting the rows and columns to my Teensy. Doing this again, I would have taken extra special care in planning this step out. As with most, I would position the Teensy under the space bar (potential drilling holes to mount it in place) and cut wires to ensure clutter-free, clean wiring.

Programming

To program the keyboard, I first explored using Hasu’s TMK firmware (free on github: here). The nice part about using TMK is that it comes with many pre-programmed layouts. Modifying a layout to fit your own custom design is also very easy. I used WinAVR to do the modifying. This requires writing in the rows and columns in your keyboard matrix and then mapping the keys functions to each key. For a very comprehensive guide on programming, check out matt3o’s guide: here.

However, I eventually came across EasyAVR which is… easy. The geekhack page (found: here) is detailed and explains everything that you need to do to create a layout. Modifying the source code is the most time consuming part. However, after that is done, the GUI makes it easy to map keys. I like how it is visual, so you can see how what your key map looks like.

Capture

I can share my firmware with anyone who wants it (email me for now until I upload it somewhere). I would highly suggest going through the process yourself. It is very satisfying and, even for an amateur like me, only took about an hour to do.

IMG_20170824_163307_edited

To flash the firmware to the Teensy, I used Teensy Loader. Quick and painless.

Case

I wanted a case that I would be proud of showing off. As such, I decided to build a wooden case myself. I chose to use 1/2″ Cherry planks for the sides and 1/4″ Cherry for the bottom. The 1/2″ planks provide enough space to screw the plate into the sides securely.

I used traditional cabinet making techniques to put the wood together. Well, I tried. This is what I ended up with a pile of wood.

IMG_20170824_172354_edited

That being said, I learned a lot about woodworking and made some mistakes that I definitely will not be making again.

IMG_20170824_161252_edited

I figured that I had wasted enough money and I really wanted to get typing, so I used the M2 screws and brass standoffs that I had purchased as a makeshift case. While the screws sometimes become a little loose, it honestly works pretty well for something so “jank”. I feel very little flex and the keyboard sits at a comfortable angle for typing.

IMG_20170824_161316_edited

However, I found this to be very unstable and, over time, the screws would unloosen and the entire keyboard would wobble. Furthermore, I experienced quite a bit of keyboard flex, even with the metal plate.

Maker:S,Date:2017-8-6,Ver:6,Lens:Kan03,Act:Lar02,E:Y

As such, I resorted to one of my most hated machines: the laser cutter. Using the files outputted by Swillkb, I was able to instantly cut out the pieces. I made the mid-layers out of cherry and the bottom layer out of acrylic. I did experience some issues with the holes being a bit off center on the acrylic layer (due to warping from the heat, I presume), but it is not noticeable. The wood was scorched by the laser cutter. Doing this again, I would cut it slightly large, then sand it to size.

Maker:S,Date:2017-8-6,Ver:6,Lens:Kan03,Act:Lar02,E:Y

As such, the back is transparent, showing off the internal components, just like the exhibition back of a watch.

Finished Product

Maker:S,Date:2017-8-6,Ver:6,Lens:Kan03,Act:Lar02,E:Y

It has its flaws: I never added a USB port to allow the cable to be detached, the soldering is a bit shoddy, and the case is scorched. It’s been a journey though and has taught me many good lessons to help me make a second, third, and many more custom boards.

Please leave a comment or send me an email if you have any questions.

Mitsubishi Kakikata 2B (and some info about other pencils for children)

Mitsubishi must be one of my favorite pencil manufacturers. I first saw the Kakikata pencil on Bobby Truby’s website Brand Name Pencils, where he has a blue one for sale. My heart was drawn to the red one, though, which has been on my search list for quite a while. Luckily, Enpitsu Philia of 鉛筆五四三 was able to help me out. Many, many thanks her!

Kakikata (書き方) means “How to write” in Japanese (I believe, although please correct me if I am wrong). The pencil is made just for that.

The round barrel makes it very easy to hold. The barrel is painted very bright colors. I have an example in red and orange, though I am aware of sky blue being another option. The colors seem fitting for a pencil meant for schoolchildren.

The lettering is silver foil on the front. On the back, there is a combination of gold foil and white paint. It looks like the foil was applied well, although the age of the pencil is visible through the wear the foil has suffered from.

IMG_20170721_141232_edited

There is a small space on the pencil for the owner to write their name. There are two other spots on top. I don’t know Japanese, so I am not sure what they are for. If you’re able to figure it out, please drop a comment or send me an email!

IMG_20170721_141454_edited

The pencil itself is made very well. The lead core is well centered, with the two halves of the wood matching in both grain and color. The halves are joined well and there is no gap between the pieces.

The paint is chipping at the edges, though I suspect this to be a result of its age rather than a manufacturing issue.

Unless I’m magically able to accumulate many, many of these pencils, I probably will never sharpen one. Honestly, I’m very satisfied with my Hi-Unis and 9800s and don’t feel a need to put another pencil into my rotation.

However, I suspect that these, along with my French Mitsubishi Uni and Mitsubishi White Pencil, will remain in my collection as “things I like”.

IMG_20170721_140836-01_edited

Some other info:

If you’re interested in other Kakikata pencils, Mitsubishi still produces a version, item number 4653. Pencil Talk did a short write up on these pencils here. There is also the Mitsubishi NanoDia, which, while not having the Kakikata label, is labeled as “for kids”. Pencil Talk also did a review of them here.

Sticking with Japanese manufacturers, Tombow has their ippo! pencil, which is categorized on their website under Kakikata. Here is a link to a random review I found on the internet: link. Gunther, from Lexikaliker, also mentions this Tombow Blue pencil that is marketed to kids. I can’t read German, but if you can or if you’d like to look at pretty pictures, here is a link.

Lastly, Staedtler also produced their own Kakikata pencil released ca. December 2016. I am working on getting my hands a box of each set, but in the mean time, please check out Bleistift’s post here.

French Mitsubishi Uni HB

Sometimes, I’m just drawn to certain things. For some reason, white pencils have always been one. I saw this Mitsubishi Uni HB on Bobby Truby’s Brand Name Pencils. I was adding a bunch of pencils to my cart, but later on forgot about it until I contacted him about a trade, in which this Franco-Japanese pencil was included!

collateuni

Getting the pencil in person, I found an odd beauty to it. Like many of Mitsubishi’s higher end pencils, foil was used on the lettering. The gold foiling can be seen on other pencils, such as the Hi-Uni (my personal favorite), but the hardness was embossed using a purple/magenta foil. Might sound like an odd combination, but I sure wish they made other pencils with this purple foil on white lacquer combination.

IMG_20170721_145411_edited
Check out the pretty floral pattern as well as that purple foiling!

On the reverse of the pencil, there is a set of three sentences in French: “Je tu veux te donner un coup de point. Je t’aime. veux t’embrasser.”

Pardon my French, for it is rusty (non-existent), but using Google Translate, I came up with the translation of: “I want to give you a punch. I love you. I want to kiss you.”

IMG_20170721_145338_edited
“I want to give you a punch.”
IMG_20170721_145341_edited
“I love you.”
IMG_20170721_145344_edited
“Want to kiss you.”

Translated, it sends some mixed signals, but perhaps it’s trying to be romantic? I could come up with some theories, but it would all just be conjecture.

I’m not one for clutter, but this is another one of those pencils that won’t get sharpened or used. Maybe it’ll be a gift for a special lady friend, or maybe I’ll just like it so much and keep it. I think I need more.

If you’d like to buy one, I believe Bobby Truby still has some over here (I didn’t get paid for this link). Try not to buy them out, though. I still need to stock some up for the future.

Pentel Clic Eraser Review

Introduction

IMG_20160804_230200

I like push erasers. They provide a precise, long lasting erasing in a compact form-factor. However, since an eraser only erases as good as the eraser material, not only is the design of the push-mechanism important, but the refills themselves have to be decent.

The Pentel ZE-21 and the Pentel ZE-22 are the two models of “Clic” push erasers. The ZE-22 can still be purchased at local office supply stores, while the ZE-21 has been discontinued. Today, we’ll be taking a look at the two and I’ll be explaining why the Pentel “Clic Eraser” ZE-21 is in my EDC.

Specs

Place of manufacture: Japan
Price: $3 (ZE-21, must be purchased from reseller), $4 for four (ZE-22), $16 (box of 24 ZER-2 refills)

Design

IMG_20160523_233251.jpg

The ZE-21 is made completely from plastic while the ZE-22 has a plastic body with a rubber grip. On both, pushing the pocket clip down and then forward extends the eraser. The clip assembly holds the eraser refill through friction.

On the ZE-21, the body is smooth down to the grip, which is simply the same material, but ribbed. It is not particularly grippy, but is textured enough to get a firm grasp on when erasing.

IMG_20160523_233303.jpg

IMG_20160804_225544
ZE-22 (right), ZE-21 (left)

The ZE-22 on the other hand has textured plastic, as well as a rubber grip with a texture of the same design. This adds a few millimeters to the diameter. The rubber is soft and can be removed.

The clips have slightly different designs with the ZE-21 having a flatter and more boxy look while the ZE-22 has more curves. The plastic used for the clip is darker and has a shiner finish on the ZE-22, which matches the type of plastic used on the body. On the other hand, the plastic used on the ZE-21 is duller and feels a tad rougher.

The end caps on the ZE-21 and the ZE-22 differ a bit, with the ZE-21 having a more refined look with an indentation, while the ZE-22 is flatter. The flatter look accentuates the molding lines on the plastic, although the ZE-21 has a very noticeable bump in the middle of the cap.

IMG_20160523_233351.jpg

The refill comes either in boxes of 24 or individually. The individual refills are packaged in thin plastic with a sheet with instructions surrounding the refill itself.

Though the model number is ZER-2, it appears that the “2” was not stamped on this particular packaging or that the packaging is generic.

Fit and Finish

IMG_20160806_110314

The product was not meant to be an expensive one and the fit and finish is reflective of this. There are molding lines on the plastic and the parts have uneven colors. The lettering on the body is a bit uneven and is prone to wear.

Functionality

The first thing you notice when you see my ZE-21 is that the paint has worn off the body. I didn’t intentionally scrape the paint off with my nail, but instead, the paint wore off through use and wear in wherever it was thrown into. The force required to extend the eraser has lessened over time, although this is only obvious through the different sounding clicks that it makes.

IMG_20160806_110955
Eraser Test on Rhodia Notebook

ZE-21 vs ZE-22

With respect to erasability, since the refills are identical, they have the same performance. However, while the eraser holders look similar and share many attributes, their differences make one superior, in my opinion, to the other.

IMG_20160523_233308.jpg

The ZE-22’s action does not feel sturdy after multiple uses. I believe this to be because of the design of the clip itself. The clip, while stylish, is connected by a thin piece of plastic. On the other hand, the ZE-21 is held together with a shorter piece of thin plastic, giving it less wiggle.

IMG_20160809_222409

Further, the ZE-22’s grip “improvement” is a short term and unnecessary improvement. With the rubber grip, the ZE-22 is no longer able to be placed flat on a surface. Further, the grip accumulates dirt and grime quickly. After a while, the elasticity of the rubber will degrade and the grip will not fit flush with the body of the eraser.

IMG_20160523_233105

The ZE-21, on the other hand, is simply one piece of plastic. As such, it’s only weakness is the “press” tab on the side of the eraser, which can lose its tension over time. This tab can However, as this is not necessary for the eraser’s usability, it is not important that it remain in perfect condition.

Conclusion

The push eraser has a special place in a stationery user’s arsenal. It is compact and convenient while providing accurate erasing. The Pentel Clic series uses the polymer eraser refills that Pentel is known for in a mechanism that is cheap and simple. While Pentel has tried to improve on the product, the older ZE-21, in my opinion, beats out the newer ZE-22. However, either eraser would prove to be useful and, at this price point, getting a few spares won’t break the bank.

Curved Blade Sharpeners: The Faber 4046/4048

Today, we’re going to be talking about the curved “Janus” sharpeners made by A.W. Faber and Faber-Castell.

4046-4047ad
An old advertisement for the A.W. Faber 4046 and 4047 (1)

A.W. Faber 4046

patent
(Patent #: DE964034)

From some research on the internet, it would appear as though the 4046 was manufactured between 1930 and 1935. My correspondence with the Faber-Castell historian revealed that first 4046s were probably sold in 1935. I have seen two variants: one where the corners are a little rounded and another where the corners and sharp. The historian verified my findings.

The blade on the 4046 has a single caret ( < ) on one side and a double caret ( >> ) on the other.

Production of the 4046 was stopped temporarily during WWII, but resumed after the war. It was now produced in two different metals: brass and duralumin.

Patent #: DE964034 is for a curved sharpener. Gunthur Schmidt of Lexikaliker mentions (albeit in German, which I know little of) that this patent showcases a curved blade sharpener with what appears to be a smaller hole for sharpening leadholders. This makes use of both sides of the blade.

IMG_20160704_221922
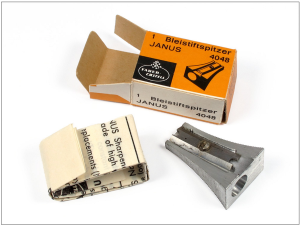
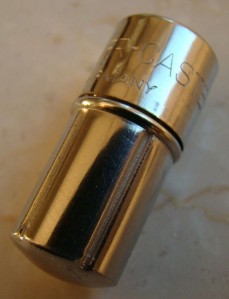
I managed to purchase an A.W. Faber 4046 off of Etsy for a decent price. Faber 4046s go for between $40 and $100 depending on condition.

Mine is a fairly worn example.The brass is showing signs of uneven oxidation. I was a bit concerned by the corners, edges and jimping, but the metal itself has worn down very little.

The blade itself has no rust, which really surprised me due to the high carbon content of the blades. There is some discoloration in some areas, though, but none that would change its usability.

One thing to note about purchasing a used sharpener is that the blade is you cannot resharpen the blade. This will change the distance between the blade and the edge of the sharpener, causing an oddly shaped pencil point.

IMG_20160704_221942
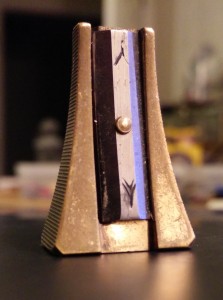
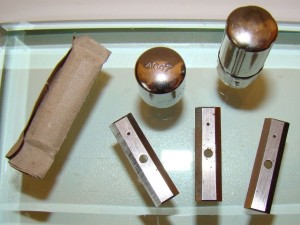
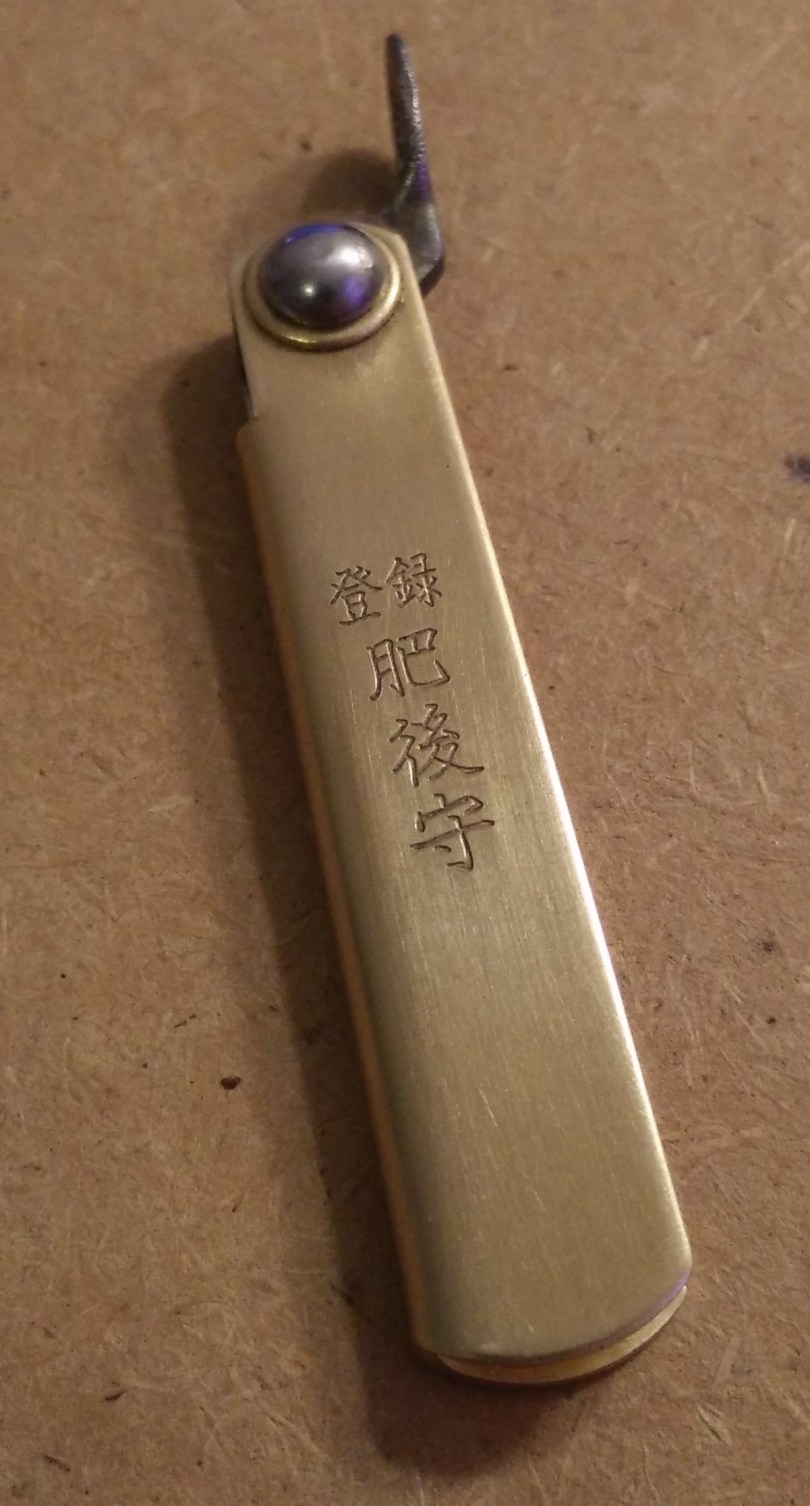
If there was anything that disappointed me about the purchase, it was the condition of the screw. It looked as though someone used a screwdriver that was too small and completely mangled the head of the screw. I have not attempted to remove it yet, but once I do, I will be trying to find a replacement at once.

One interesting thing to note is that the place of manufacture stamp. Since it says “Germany”, we know for sure that it was produced before the Second World War or after reunification, of which the latter would be improbable.

I was quite impressed by the curvature of the sharpener. It’s just gorgeous at every angle.

Sharpening a pencil is quite easy. The knurling is grippy enough that the sharpener stays firm in the hand. The blade is a bit dull, but it has enough life in it to give a pencil a point. I decided, for my first pencil, to sharpen a Mitsubishi 9800.

Sharpening produced a mound of shavings. The shavings are very thin, but they are not very consistent. However, there were consistently strings of 5 to 10cm. The graphite shavings were not as nice though. There were some larger chunks, and it looked like pieces were chipped off.

The tip is quite nice. When compared to a pencil sharpened by the Angel-5, it is obviously convex. The tip length is similar, though the Janus gives a more consistent tip.

Faber-Castell 4048

magnesium4048
Magnesium Faber-Castell 4048 (1)

The Faber 4048 was produced from around 1965 till the early 1970s.

The Faber 4048 came in two varieties: one made of brass and one made of duralumin. They both came in a small yellow box wrapped in waxed paper instructions. The instructions appear to be the same for both versions.

The instructions are written in 5 different languages: German, English, French, Spanish, and Italian.

instructions

Transcribed: “You have made an excellent choice in the JANUS Sharpener No. 4048. It is a sharpener of precision. The double edged reversible blade is made of high quality steel, will provide you with constant long, needle-sharp points.

The blade can be changed simply and speedily, replacements (No. 4049) being obtainable through any good stationer or drawing office dealer.

Please do not attempt to remove any lead points, which may be caught under the blade, with other than a matchstick or other non metallic implement. Better still, loosen the screw and remove the particle of lead.”

The box itself is completely in German. There’s a picture of the sharpener on the front, with the Faber-Castell logo on the bottom left corner.

The edges of the box are either plain or have the item name on them. The box below was made in the 1960s. Boxes are same for both the brass and duralumin versions.

The blades on the 4048 are different from that of the 4046. The arrows are now gone and the blade now has two indentations at each end. Further, the blade is screwed in through the top rather than the bottom. I have heard that the blades are interchangeable though.

Faber 4047

The 4047 were the replacement blades made for the 4046 and the 4047. They came in a small nickel tube. They supposedly contained half a dozen, as per the ad above, but for the most part, I have seen them containing three (perhaps due to use). Something else to note is that the replacement blades, at some point, having the caret symbols.

$_57 (1)
Ebay Auction #: 201205775017
$_57
Ebay Auction #: 201205775017


Faber 4049

4049
Faber-Castell 4049 (1)

The Faber  4049 appears to be the second variation of the replacement blades. Green boxes with white caps held five(?) blades. These were made for the Faber 4048 and the blades can most easily be distinguished from the Faber 4047 blades by the inclusion of the half circle cutouts at each end.

Picture Credit:
(1) www.lexikaliker.de
(2) My Pencils Draw Worlds

Plain Stationery & Homeware (直物生活文具)

I had a chance to visit Plain Stationery & Homeware in Taipei, Taiwan. Plain is store owned by Tiger, who runs the blog Stationeria (it’s in Chinese, but the pictures are already worth the click).

The store front is located at: 台北市羅斯福路三段210巷8弄10號, Taipei. It is about a 5 minute walk from the Taipower Building metro station.

Google maps is quite helpful in locating the street the store is on, but the store itself can be a bit hard to find. Though I have been here twice before, I still have some difficulty finding it this time around. I passed it once, before looping back.

IMG_20160527_141602

Walking into the store, the first thing one notices is how small the store is. It is the size of a small room and I bet a dozen customers would have a bit of difficulty walking about with ease.

IMG_20160527_141349The store is arranged in the shape of a zero. The middle island has a wide range of pens and pencils including the Pilot Preppy and a variety of Autopoints. I personally enjoyed the selection of dip pens and nibs. If you ask, they will let you try out any of the handle and nib combinations with any of the inks that they have.

They sell stacks of 100 sheets of fountain pen friendly paper from a variety of companies.

There are also different types of paper tapes, such as for scrap booking or schedule making.

IMG_20160527_141425

TIMG_20160527_141419
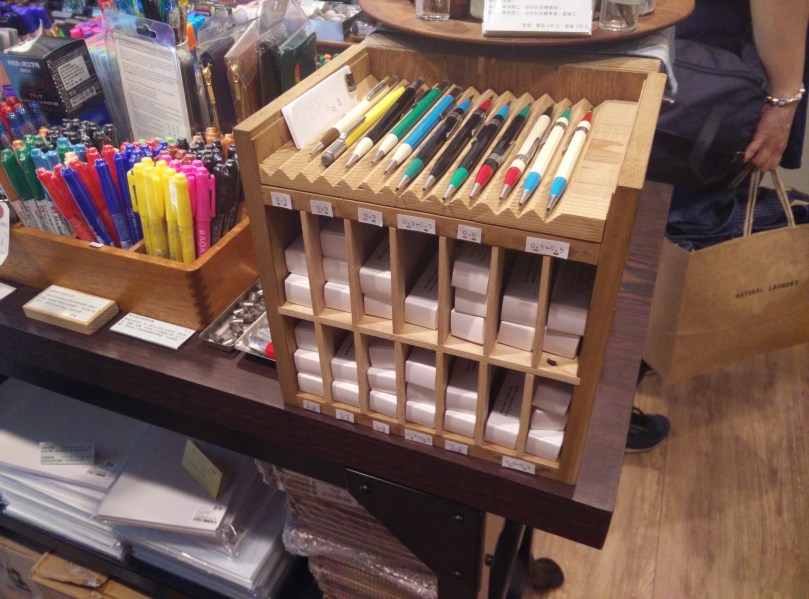
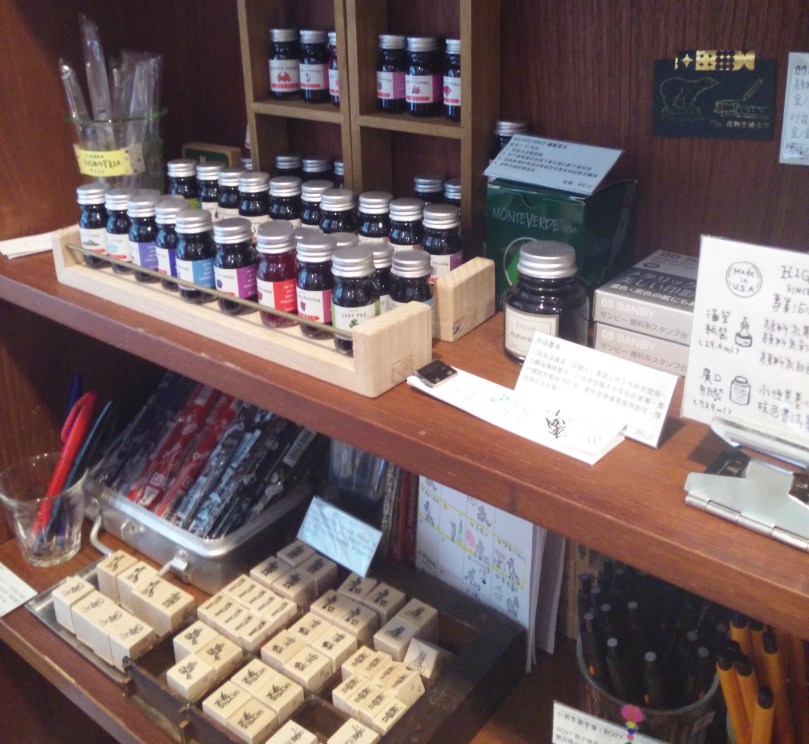
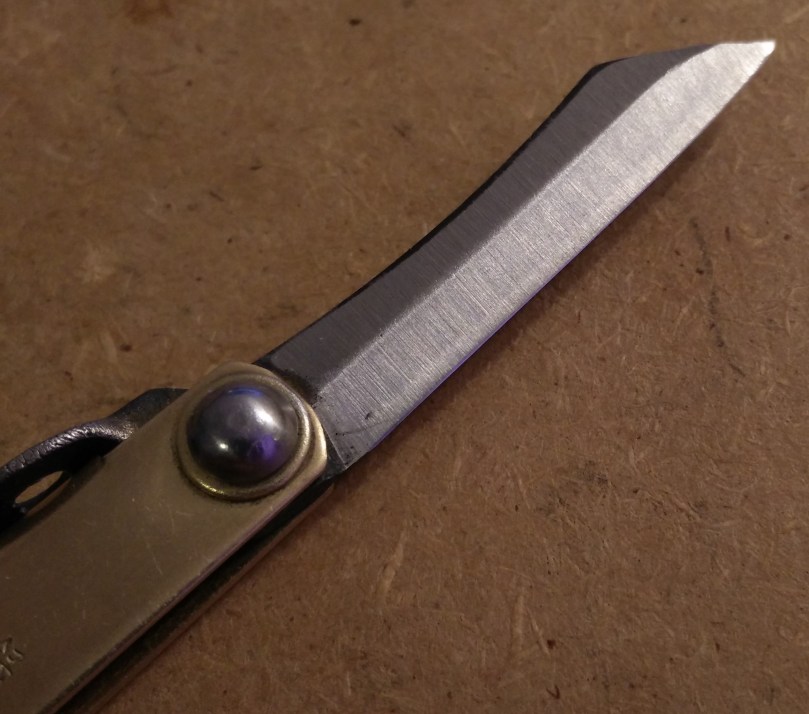
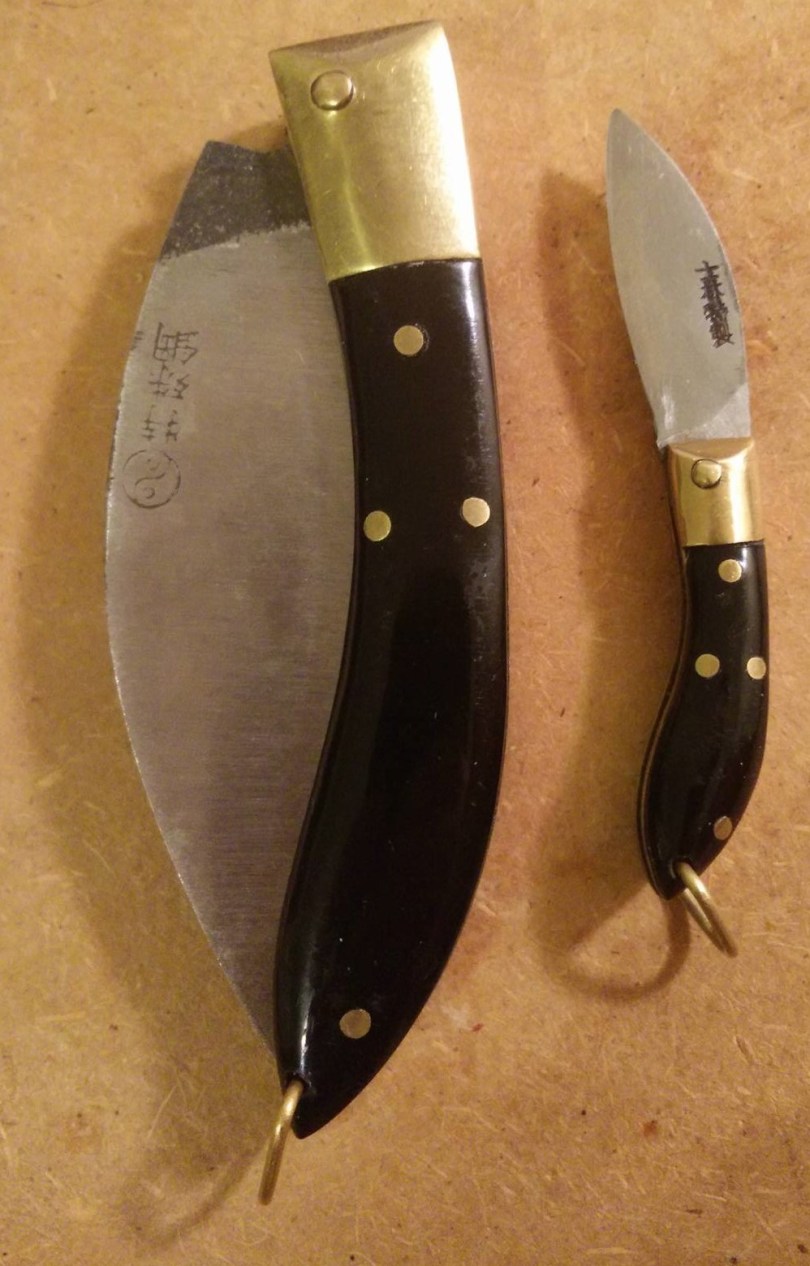
he counter holds some of the more expensive and the “deadlier” items. They sell whale shaped knives (it is where I bought mine) and a bunch of different Higonokamis. More recently, he has also been importing a few multitools and one-piece tools. Tiger managed to import Rotrings and Fisher items to his store and, due to their price, they are also kept behind the counter.

One thing to note, is that the store is very well decorated. Beyond the items that are for sale, there are a variety of interesting objects scattered across. Under the counter, there are various toys and other vintage objects. Don’t bother trying to purchase them though. When I went the first time, I tried to buy an old children’s play block with a bunny print by just placing it with the rest of my order. Tiger chucked and mentioned that it was not for sale.

IMG_20160527_141444On one of the walls, there is a wide selection of notebooks and clips. There are Field Notes, Campus, and Life Notebooks. Prices for Japanese products are much lower than in the US, while American products are a tad higher.

Much to my IMG_20160527_141453enjoyment, they have 0.4mm lead in stock, which is often hard to find in stores in the US.

Further down, they have some of my favorite pencils. They offer both Caran d’Ache pencils, such as the Swiss Wood, and Mitsubishi pencils. They also sell Palomino Blackwing pencils individually, which is convenient if you want to just try one out.IMG_20160527_141359IMG_20160527_141407

They have pencil extenders, caps, and clips as well as some more exotic items, such as the Gold Seed Eraser.

I love how they have samples of everything to try out. It’s nice to be able to hold a product in your hand before you buy it.

If you purchase a box of any item, they will give you the original box. Last time, I purchased 8 different pencils, and they gave me a Mitsubishi box anyways.

IMG_20160527_141435

The other wall has some pretty random objects. There are cubbies filled with mini rubber (or perhaps plastic, I’m not sure) animals. I believe they are for desk decorations although I would consider using them in a terrarium.IMG_20160527_141353

There are also a lot of other interesting pieces of stationery such as stamps and stamp pads and an assortment of scissors. One of my favorites is a pair that folds up.

They also have mini bottles of J. Herbin inks scattered about and  some vintage looking pens from Mitsubishi and Bic.

IMG_20160527_141505

IMG_20160527_141519

As to the “Homeware” part of the store, they sell teapots and cups and other objects I would consider “desk objects”, such as hourglasses.

I almost purchased a set of storage boxes, but decided that it might be a bit too cumbersome to bring back to the US.

They recently (early 2016, I believe), opened a coffee shop and, as such, they have begun to sell some coffee products such as the Aeropress, filters and enamel coffee mugs. Their coffee shop is definitely on my list of places to go visit!

IMG_20160527_141341

Apart from the aforementioned notebooks, there is also Midori Traveler’s series and their range of brass products. Midori has some of the nicest looking (and simple) packaging and everything just seems so orderly when displayed.

My purchase was neatly packaged by the lady behind the desk in a brown envelope. The envelope has a custom stamp on it. Mine was of a polar standing on that was being drawn with a pencil. The envelope was sealed with a some fun paper tape of a man doing a roll.

IMG_20160527_141536

It was a pleasure to come by Plain Stationery & Homeware again and I’ll be stopping back whenever I have the chance. It’s small, but what it carries fits my interests very well. They’re always adding new products and there’s never a shortage of nice looking pics on their Facebook. I have to check out their Coffee Shop and, when I do, I’ll be sure to do a write up on that as well!

Small Higonokami

Part II of my Asian knives this week. Again, I don’t really consider this a review as much as just some talking notes about the knife.

The higonokami is a traditional Japanese folding knife. It is s friction folder with a one piece handle made of brass. The blade is some sort of high carbon steel and a hamon (temper) line is visible when held at an angle.

IMG_20160307_152128

There is a large domed pivot that looks like a rivet. It can be a tad stiff to open the knife.

IMG_20160307_152324

Speaking of opening, the knife is opened by using the thumb latch (?) connected to the blade. There is a hole on this lever. In some online reviews, this particular models supposedly sometimes comes with a bell. Mine did not.

There is a tad of writing on the handle. I do not have a translation for it.

For a good overview of the Higonokami, some history on them and information on current production, check out this British Blades forum post.

Shilin Cutter (士林刀)

I’ve always been a sucker for vintage and old styles, so the Shilin Cutter, with its large blade, thin handle and brass construction, appeals to me in many ways. The knife has an interesting history, with its manufacturing starting off in mainland China before moving to Taiwan during the Chinese civil war. It’s modern history is a bit messier, with family squabbles taking down the main manufacturer and a wave of custom makers spawning. For a fairly comprehensive history and overview of the Shilin Cutter, check out this British Blades forum post.

I acquired two examples of the Shilin Cutter this past summer at a small knife shop in the middle of a traditional market in Taiwan.

The first knife that I saw was this small one. The blade length is about the diameter of a quarter. It was kept under a glass panel in an old plastic bag. I immediately said “Yes, I’ll take it” before asking if she had anymore.

She pulled out this larger knife (size comparison at the end). She would not let me remove the knife from the bag it was kept in nor would she open it in front of me. I looked it over and it seemed like any other NOS (new old stock) knife, with a bit of patina and discoloration. Boy, was I wrong…

This larger knife had a multitude of issues, including a backspring that was so not flush that it makes the knife unusable. The sharp brass edges catch in the nooks of my hand making any task impossible. Furthermore, there was a rolled edge and the stamped logo was very faint.

With both knives, there was a thick layer of a mysterious “gunk”. I would assume that it is a type of oil something to keep the blades from rusting. I was told the smaller knife was made out of “white steel” which, if it is like anything the Japanese use, is a high carbon steel. While I was able to get most of this substance off the smaller knife, it was much more difficult on the larger blade and I eventually gave up.

I am disappointed with this experience? Both yes and no. I got one knife that I have no idea what to do with. I might experiment with grinding down either the blade or the backspring to make the larger knife useful, but that will be a project for some time down the road. On the other hand, I absolutely adore the smaller knife. Sure, the backspring has some gaps with the scales, but I honestly don’t mind that much. The knife wasn’t meant to hard tasks and as long as it stays on my desk or on my keychain for use as a letter opener, I don’t see myself noticing its flaws.

Next time I’m in Taiwan, I’ll check out some of those custom makers. The prices can get a bit high, so there’s no guarantee that I’ll purchase anything.

As a piece of history, these knives are certainly interesting. As tools, their design has the opportunity to be much more than the examples that I have. With tighter tolerances and more attention to detail, I could see myself “EDCing” one of these.

For more information, check out the original Shilin knife site or the aforementioned British Blades forum post.

Blackwing 602: Eberhard Faber vs Palomino

IMG_20160215_214652

The Blackwing 602 might be one of the world’s most famous pencils. In its original iteration, Eberhard Faber created a pencil using fantastic wood and a near magic lead. To this day, there are those who swear by this vintage pencil and hold it second to none. However, for those that aren’t willing to shell out the incredulous sums for a pencil (not even mentioning the dwindling numbers of them), there is the new version made by Palomino. It has a similar color, look and ferrule, but how does it stack up to the vintage marvel?

IMG_20160215_214659

The original Blackwing 602 (reviewed here) feels premium in the hand. The lacquer does not feel or look glossy but, instead, looks matte and feels delicate. On the other hand, the Palomino has a high sheen. It is silky smooth to the touch and it reflects light like fresh snow. I personally prefer the Eberhard Faber paint although the gold foil letter is often too fragile because of age. The Palomino feels like a tank that can hold up to being thrown into a backpack or a pocket.

IMG_20160215_214659

The recognizable ferrule is almost identical on both. On the original, there were a few versions with a black band (these are often more expensive). Erasers are interchangeable and I have no complaints with either.

IMG_20160215_214743

Now for the important part: the graphite. Here’s the brutal truth: I’d be fine with either pencil. Both leads feel smooth gliding across paper. There are minor differences though. The original Blackwing seems to have a tad more feedback than the new one. It’s difficult to describe the feeling as it does not feel scratchy or rough, though you know it’s there. On the other hand, the Palomino is just straight up glass smooth.